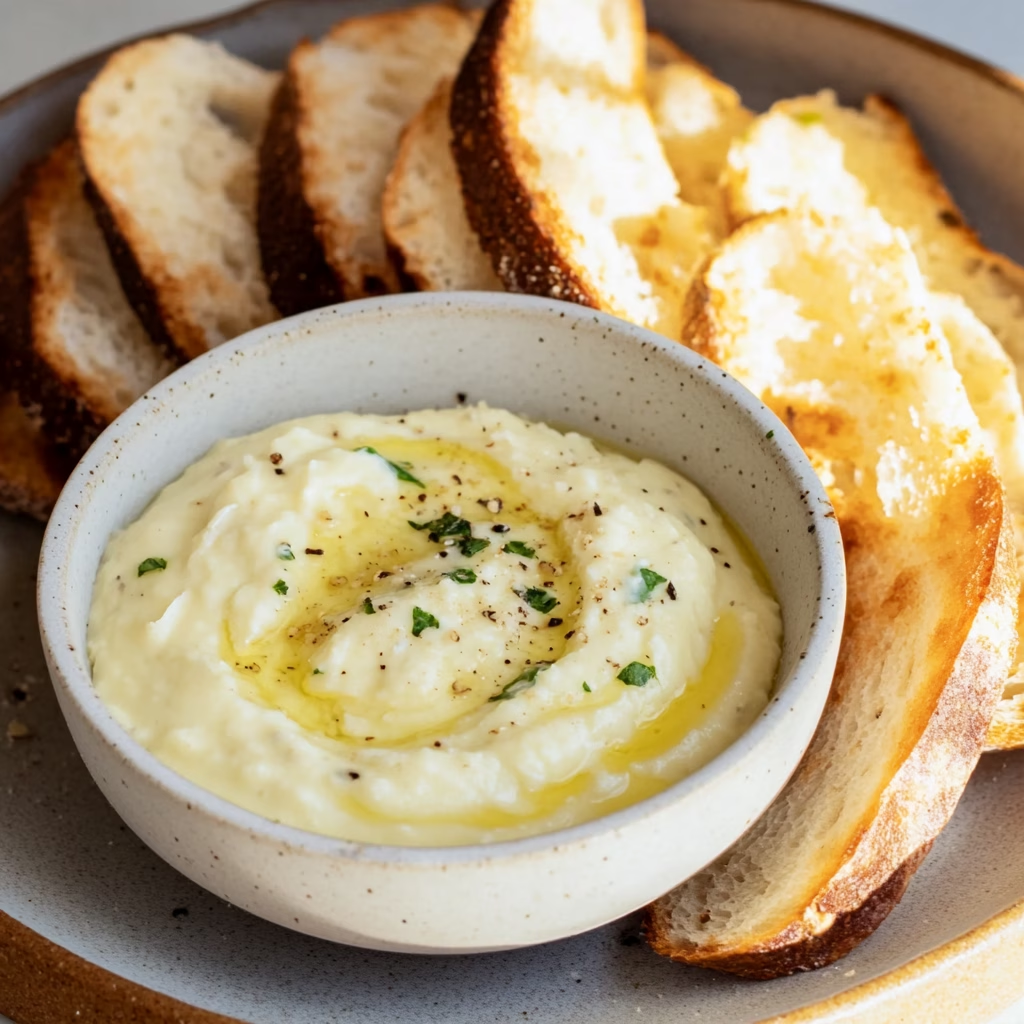
Okay, garlic lovers, gather ‘round! 👋 Let me tell you the story of how I accidentally became the “Aioli Queen” at my last dinner party. Picture this: My cousin’s vegan, my neighbor’s gluten-free, and my bestie’s on a keto kick. I panicked. Then I whipped up this roasted garlic aioli, slathered it on everything—grilled veggies, crusty bread (gluten-free for Karen), even dunked my dog’s treat in it (don’t judge). The result? Silence. Just happy chewing noises. One guest even said, “This tastes like a fancy restaurant… but better because we’re in sweatpants.” 🧄✨ And guess what? It’s STUPID easy. Let’s make magic happen!
🌟 Why This Roasted Garlic Aioli Will Steal the Spotlight (and Maybe Your Heart)
✅ 5 Ingredients, 1 Bowl, ZERO Fancy Skills – Seriously, my cat could make this (if he had thumbs).
✅ Roasted Garlic = Flavor Sorcery – Sweet, caramelized, zero harsh bite. Perfect for garlic newbies!
✅ Meal-Prep MVP – Stays fresh for weeks… if it lasts that long.
✅ Vegan? Keto? Gluten-Free? – Nail it every time with simple swaps.
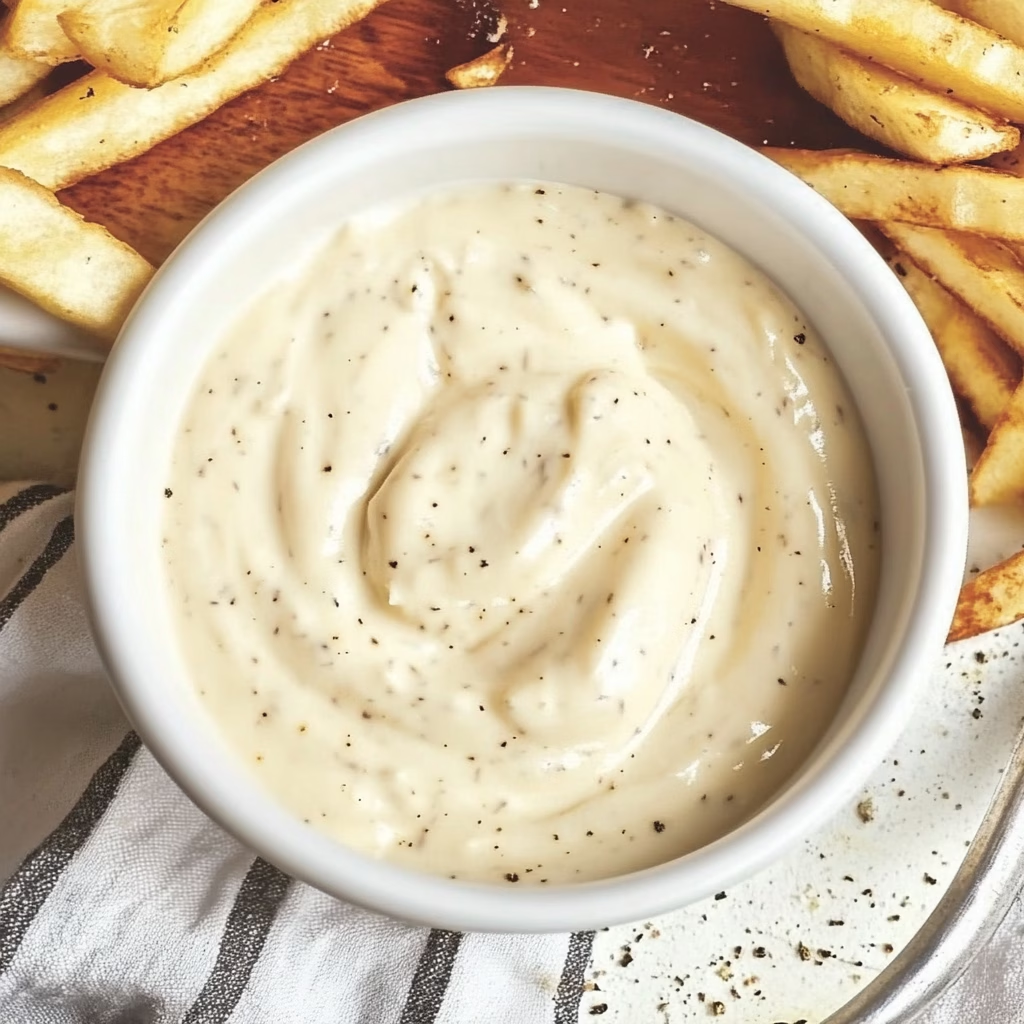
✅ Crowd-Pleaser – Dip it, spread it, drown your fries in it. No one will complain.
True Story: My first batch looked like cement paste because I forgot to peel the garlic. 😂 Now I always roast the whole head—no peeling required!
🛒 Ingredients for 1.5 Cups (Double It… You’ll Thank Me Later)
🧄 The Fab Five
- 2 Whole Garlic Heads – Look for tight, papery skins—avoid green sprouts!
- 1 Cup Mayo – Hellmann’s for life, but vegan mayo works too!
- 3 Tbsp Extra Virgin Olive Oil – 1 tbsp for roasting, 2 for richness!
- 1 Lemon – Zest + juice (about 2 tbsp). Pro tip: Microwave lemon for 10 secs to max the juice!
- 1 Tsp Smoked Paprika – Adds a campfire vibe. No campfire required.
- Salt & Pepper – Flaky sea salt + freshly cracked pepper = chef’s kiss.
🌈 Optional Upgrades (Because Why Not?)
- 1 Tbsp Dijon Mustard – For tangy zing!
- 1 Tsp Honey or Maple Syrup – Balances garlic’s sass.
- Fresh Herbs – Rosemary, thyme, or chives. (Snip with scissors like a boss!)
- Spicy Kick – 1/2 tsp cayenne or a squeeze of sriracha.
👩🍳 Step-by-Step: Foolproof Roasted Garlic Aioli Even Your Grandma Would Brag About
Part 1: Roast That Garlic Like a Pro
- Preheat & Prep: Crank your oven to 190°C (375°F). Slice ¼ inch off the top of each garlic head to expose the cloves. Drizzle with 1 tbsp olive oil, wrap in foil like a tiny garlic burrito, and roast for 40-45 minutes. Your kitchen will smell like an Italian grandma’s hug.
- Air Fryer Hack: No time? Roast garlic in the air fryer at 160°C (320°F) for 25 minutes!
- Pro Tip: Throw a sprig of thyme or rosemary into the foil pouch for herby undertones!
- Cool & Squeeze: Let garlic cool until you can handle it. Squeeze the soft, golden cloves into a bowl—they’ll pop out like garlic toothpaste (the good kind). Mash gently with a fork.
Part 2: Blend Your Way to Glory
- Mix the Base: In a blender (or a bowl + whisk), combine mayo, roasted garlic, lemon zest/juice, smoked paprika, and a pinch of salt. Taste as you go—this is your moment!
- No Blender? Use a fork! Mash the garlic first, then whisk like you’re angry at the mayo.
- Drizzle & Dream: While blending, slowly pour in 2 tbsp olive oil. This emulsifies the aioli into silky perfection. Too thick? Add a splash of water. Too thin? More mayo!
- Rest & Marry: Let the aioli chill in the fridge for 30 minutes (if you can wait). The flavors will mingle like old friends at a reunion.
More Sides:
- Avocado Toast with Sunny-Side-Up Egg
- Meal Prep: Honey Chipotle Chicken and Rice – Sweet, Smoky & Ready for the Week
- Valentine Chocolate Covered Strawberries – Romantic, Decadent & Foolproof
- Mozzarella Pepperoni Croissant Rolls – The Ultimate Cheesy Snack Your Family Will Beg For!
- Are These Garlic Cheese Bombs the Ultimate Delicacy Food?
- Old Faashioned vegetables beef soup

🔥 Pro Tips: From “Meh” to “Michelin-Star”
🌱 Dietary Hacks
- Vegan Vibes: Use avocado-oil mayo + 1 tbsp aquafaba (chickpea juice) for fluffiness.
- Paleo Power: Swap mayo with ½ cup cashew cream (soak cashews overnight, blend with water!).
- Garlic Overload: Add 1 raw minced clove. Warning: Vampires may avoid you.
🍋 Flavor Twists (Get Creative!)
- Citrus Fiesta: Swap lemon for lime + orange zest. Tropical vibes!
- Truffle Shuffle: Stir in 1 tsp truffle oil post-blend. Instant fancy.
- Herb Garden: Fold in 2 tbsp chopped dill, basil, or tarragon. Fresh AF.
🧊 Storage Secrets
- Fridge: Keep in an airtight jar for up to 2 weeks. Label it “Not Mayo” so no one steals it.
- Freezer: Pour into ice cube trays, freeze, then pop into soups or sauces later!
❓ FAQ: Your Roasted Garlic Aioli Anxiety, Solved!
“Can I use pre-minced garlic?”
Technically yes… but roasted garlic is 100x better. Pre-minced lacks that caramelized magic. Don’t cheat yourself!
“Why is my aioli too thick/runny?”
- Thick: Whisk in 1 tsp water or lemon juice.
- Runny: Add 1 tbsp mayo or Greek yogurt. Crisis averted!
“Help! My aioli separated!”
Don’t panic! Blend in 1 tsp hot water or 1 egg yolk (if non-vegan) to reunite the gang.
🍟 Serving Ideas: Beyond the Fries (But Fries Are Great Too)
- Sandwich Savior: Slather on burgers, BLTs, or veggie wraps. Bye-bye, boring mayo!
- Brunch Boss: Dollop on avocado toast, eggs Benedict, or smoked salmon bagels.
- Dip Dynasty: Pair with crispy artichokes, roasted carrots, or sweet potato wedges.
- Grill Master: Brush onto shrimp, chicken, or portobello mushrooms before grilling. Charred perfection!
🌍 Cultural Context: Aioli’s Fancy-Pants Roots
Aioli (meaning “garlic and oil” in Catalan) hails from the sunny Mediterranean, where it’s been a staple since Roman times. Traditional versions involve pounding garlic with a mortar and pestle until your arm falls off. Our roasted garlic twist? All the flavor, none of the arm cramps.
🚀 Why This Roasted Garlic Aioli Beats Anything in a Jar
It’s creamier, bolder, and free of weird preservatives—plus, you control the garlic level (no awkward post-lunch breath surprises!). Whip up a batch today and watch it disappear faster than cookies at a gym. 😉
P.S. My partner once ate it by the spoonful—true story. Tag me in your saucy creations with #AioliAddict! 🧄✨
Roasted Garlic Aioli
Ingredients
For the Aioli:
- 2 whole garlic heads
- 1 cup mayonnaise vegan mayo works too
- 3 tbsp extra virgin olive oil 1 tbsp for roasting, 2 tbsp for mixing
- 1 lemon zest + 2 tbsp juice
- 1 tsp smoked paprika
- Salt & pepper to taste
Optional Add-ins:
- 1 tbsp Dijon mustard adds tang
- 1 tsp honey or maple syrup balances flavors
- Fresh herbs rosemary, thyme, or chives
- ½ tsp cayenne or sriracha spicy kick
Instructions
Roast the Garlic:
- Preheat oven to 375°F (190°C).
- Slice ¼ inch off the top of each garlic head to expose the cloves.
- Drizzle with 1 tbsp olive oil, wrap in foil, and roast for 40-45 minutes.
- Let cool, then squeeze out the soft, roasted garlic.
- Air Fryer Hack: Roast at 320°F (160°C) for 25 minutes.
Mash & Mix:
- In a bowl, mash the roasted garlic into a smooth paste.
- Add mayo, lemon zest/juice, smoked paprika, salt, and pepper.
- Whisk until fully combined.
Emulsify:
- Slowly drizzle in 2 tbsp olive oil while whisking or blending until smooth.
- If too thick, add a splash of water.
Chill & Serve:
- Refrigerate for at least 30 minutes to enhance flavors.
Notes
✅ Paleo-Friendly: Swap mayo with ½ cup cashew cream.
✅ Flavor Boost: Add truffle oil, lime zest, or fresh herbs.
✅ Storage: Keep in an airtight container for up to 2 weeks. Freeze in ice cube trays for longer storage.


6 thoughts on “🧄 Roasted Garlic Aioli: The Creamy, Dreamy Condiment That’ll Make You Question Store-Bought Forever”
Comments are closed.