Caramelized onions are one of those kitchen miracles I can’t live without. Imagine this: sharp, pungent onions transforming into golden, buttery-sweet ribbons of flavor that make everything taste better. I’m talking burgers, pasta, pizza, soups, sandwiches—you name it! And guess what? You don’t need fancy skills or ingredients. Just onions, a pan, and a little patience. Let me walk you through my foolproof method, share my favorite tricks, and show you why my perfect caramelized onions deserve a permanent spot in your kitchen!
Why You’ll Love This perfect caramelized onions (Yes, Even If You’re a Beginner!)
Before we dive in, let me tell you why I’m obsessed with caramelized onions—and why you will be too:
- They’re Crazy Simple: No chef-level skills required. If you can slice an onion and stir a pan, you’ve got this!
- Budget-Friendly Magic: Onions are cheap, but caramelizing turns them into something luxurious.
- Meal Upgrade Secret Weapon: A spoonful elevates even basic meals (think scrambled eggs or canned soup).
- Freezer-Friendly: Make a big batch and stash it for lazy days. Future-you will high-five present-you!
- They Smell Amazing: Your kitchen will smell like a cozy French bistro. Trust me, it’s therapy.
My perfect caramelized onions Onions “Aha!” Moment
Let’s get personal: My first attempt at caramelizing onions was a disaster. I cranked the heat to “volcano mode,” thinking I’d save time. Ten minutes later: blackened, bitter onion crisps. Lesson learned! Now, I embrace the “low and slow” mantra. These days, I caramelize onions weekly while sipping coffee or chatting with my family. It’s become my kitchen therapy—and the payoff is SO worth it.
What You’ll Need (Hint: It’s Probably Already in Your Kitchen!)
Here’s your grocery list (spoiler: it’s short!):
- 4 large onions (yellow onions are my go-to—they’re sweet and affordable)
- 2 tbsp butter or olive oil (or both! I use 1 tbsp of each for richness + better browning)
- ½ tsp salt (draws out moisture and deepens flavor)
- Optional extras: ½ tsp sugar (boosts sweetness), ¼ cup water/broth/balsamic vinegar (for deglazing)
Why these ingredients?
- Yellow onions have the perfect sugar content. Red onions work for a colorful twist!
- Butter adds creamy depth, while oil prevents burning. Together, they’re dreamy.
- Salt is non-negotiable—it breaks down the onions’ fibers, speeding up caramelization.
Step-by-Step Guide (Let’s Get Cooking!)
Follow these steps, and I promise you’ll nail it:
1. Slice the Onions Like a Pro (No Tears, I Swear!)
- Cut onions in half root-to-tip (this keeps them intact while slicing).
- Peel, then slice thinly (¼-inch thick). Too thick = uneven cooking; too thin = mushy.
- Pro Tip: Chill onions for 30 minutes before cutting. Less tears, more smiles!
2. Choose Your Pan Wisely
- Use a wide, heavy-bottomed skillet (stainless steel or cast iron). Nonstick pans don’t brown as well.
- Why size matters: Crowded onions steam instead of caramelize. Give them space!
3. Heat the Pan & Melt the Fat
- Warm the pan over medium-low heat. Patience is key!
- Add butter/oil. Once it shimmers (not smokes!), add onions.
4. Cook Low & Slow (Seriously, Don’t Rush!)
- Stir to coat onions in fat. Sprinkle with salt (and sugar if using).
- Let them cook uncovered for 35–45 minutes, stirring every 5–7 minutes.
- First 10 minutes: They’ll soften and turn translucent.
- 20 minutes in: Pale golden color appears. Smell that sweetness?
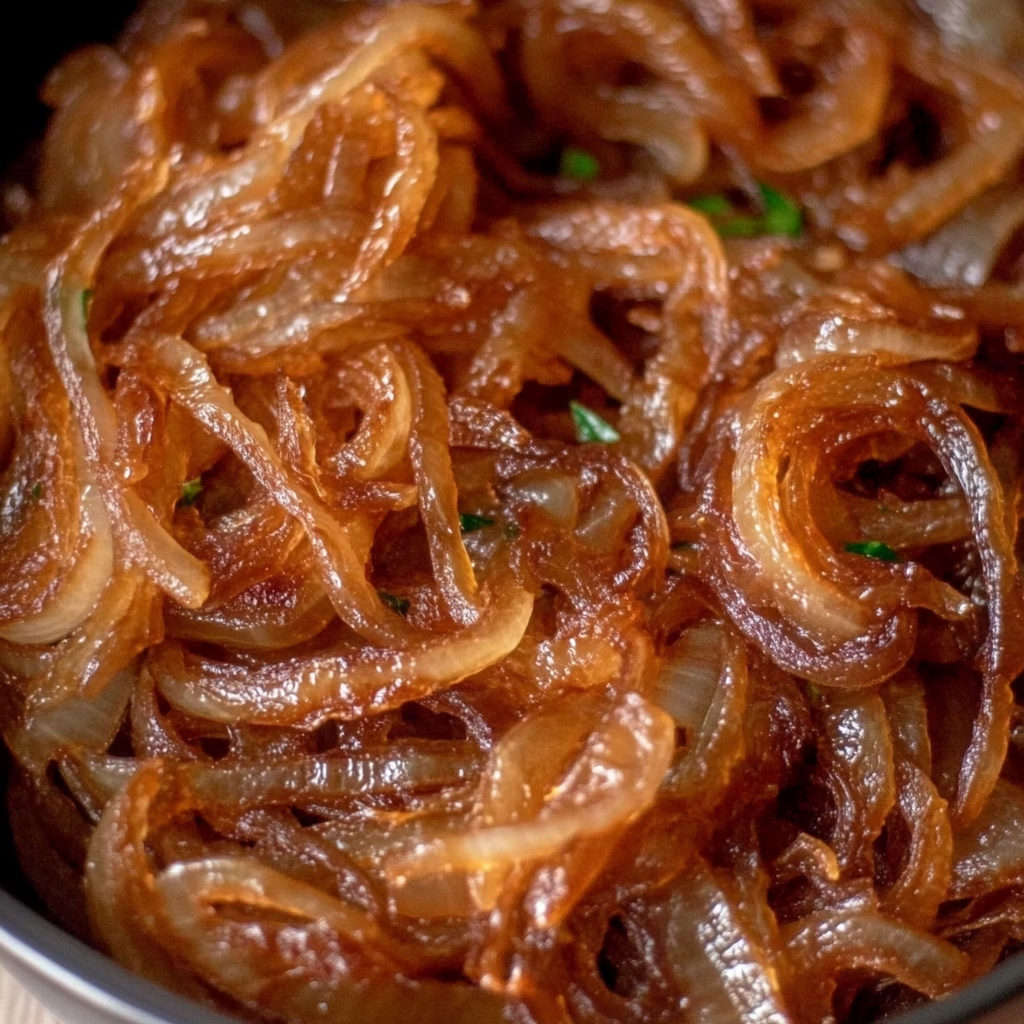
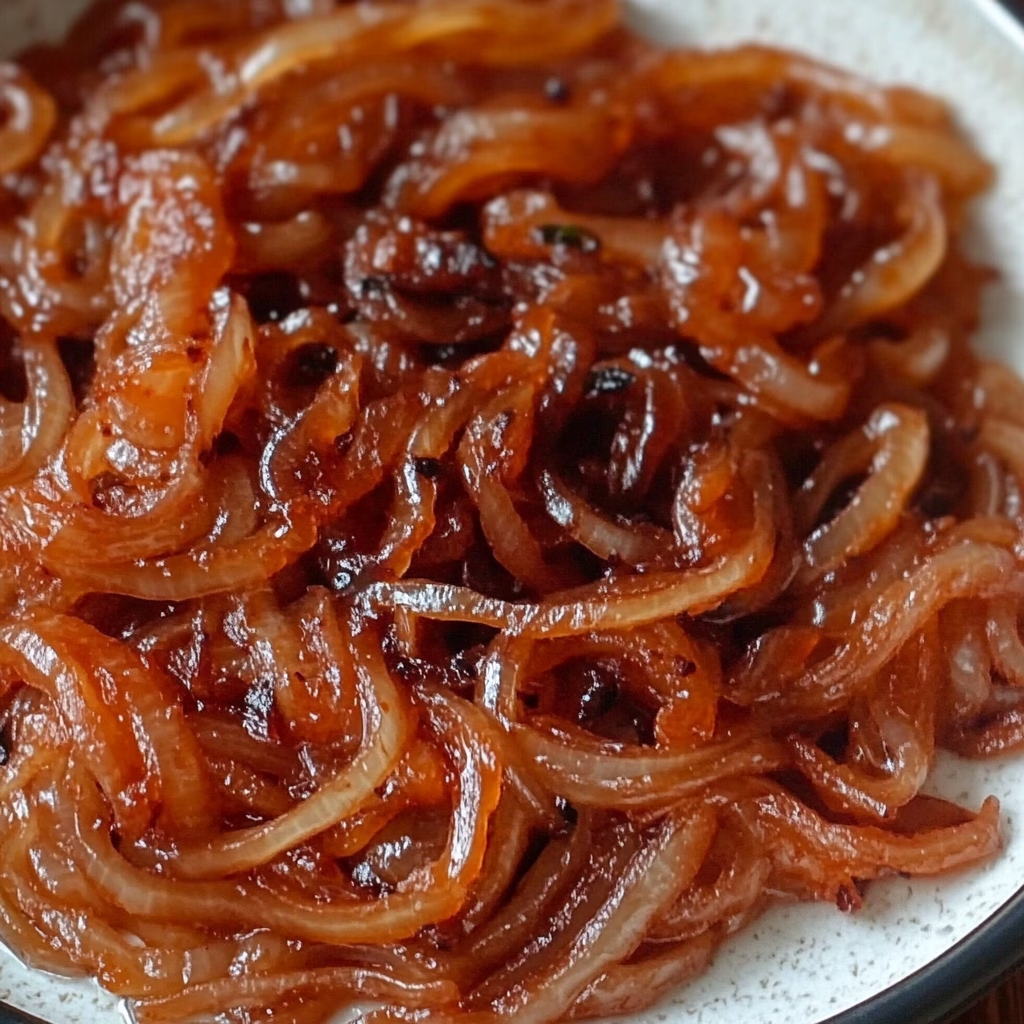
- 30+ minutes: Deep amber hue and jammy texture. This is the goal!
5. Deglaze for Extra Flavor (My Secret Weapon!)
- If brown bits stick to the pan, add a splash of water, broth, or balsamic vinegar. Scrape the pan—those bits are flavor gold!
6. Taste & Adjust
- Need more sweetness? Add a pinch of sugar. More depth? A dash of black pepper.
More Relative Recipes:
- Pineapple Chicken & Rice – A Sweet and Savory Delight Your Family Will Beg For!
- Baked Garlic Parmesan Potato Wedges
- Crispy Bang Bang Chicken – So Easy and So Yummy!
- Easy Lemon Butter Baked Cod Recipe for Busy Moms
- Chinese Pepper Steak – My Family’s Favorite Stir-Fry! (Made Super Simple!)

10 Tips for Caramelized Onion Perfection (Learn From My Mistakes!)
- Patience Wins: Turn on a podcast and relax. Rushing = burnt onions.
- Low Heat Only: If your stove runs hot, go lower. Better safe than sorry!
- Don’t Over-Stir: Let the onions sit a bit between stirs for better browning.
- Storage Hacks:
- Fridge: Keep in an airtight container for 5 days.
- Freezer: Portion into ice cube trays for 3 months.
- Double the Batch: Caramelizing takes time—make it worth your while!
- Sweetener Swap: Try honey or maple syrup instead of sugar.
- Herb It Up: Toss in thyme or rosemary during cooking.
- Acid Magic: Finish with lemon juice or vinegar for brightness.
- Cheat (Shh!): Add a pinch of baking soda to speed up browning—use sparingly!
- Multitask: Cook onions while prepping other meals.
7 Delicious Ways to Use Caramelized Onions (Get Creative!)
- Breakfast: Fold into omelets, top avocado toast, or mix into hash browns.
- Lunch: Upgrade grilled cheese, grain bowls, or hummus wraps.
- Dinner: Stir into risotto, pasta, mashed potatoes, or gravy.
- Pizza Night: Swap marinara for caramelized onions + goat cheese.
- Burgers & Sandwiches: Pair with blue cheese or fig jam.
- Appetizers: Layer on crostini with brie or prosciutto.
- Soup Base: Start French onion soup or beef stew with them.
FAQs (Your Questions, Answered!)
Q: Can I use red onions?
A: Absolutely! They’re slightly tangier—perfect for salads or tacos.
Q: Why are my onions burning?
A: Heat’s too high. Lower it and add a splash of water to cool the pan.
Q: Can I make these vegan?
A: Yep! Use olive oil or vegan butter.
Q: How do I know when they’re done?
A: They’ll be dark golden, soft, and smell intensely sweet.
Final Thoughts (You’ve Got This!)
Caramelized onions might seem intimidating, but they’re truly forgiving. Even if you slightly undercook or overcook them, they’ll still taste amazing. I’ve burned a batch or two (hey, we’re human!), and guess what? They still got sprinkled on pizza and devoured. So grab those onions, take a deep breath, and let the magic happen. Once you master this skill, you’ll add it to EVERYTHING.
Now I’d love to hear from you! Have you tried caramelizing onions? What’s your favorite way to use them? Tag me on social or comment below—let’s geek out over onions together! 🧅❤️
How to Make Perfect Caramelized Onions
Ingredients
- 4 large yellow onions or white/red onions
- 2 tbsp butter or olive oil or 1 tbsp each
- ½ tsp salt
- ½ tsp sugar optional, for extra sweetness
- ¼ cup water broth, or balsamic vinegar (for deglazing, optional)
Instructions
- Slice the Onions:
- Cut onions in half root-to-tip, peel, and slice thinly (¼-inch thick).
- Heat the Pan:
- Place a large, heavy-bottomed skillet over medium-low heat. Add butter or oil.
- Cook the Onions:
- Add sliced onions to the pan. Stir to coat in fat, then sprinkle with salt (and sugar if using).
- Caramelize Low & Slow:
- Cook uncovered for 35–45 minutes, stirring every 5–7 minutes. Onions will soften, turn golden, and develop a jammy texture.
- Deglaze (Optional):
- If onions stick, add a splash of water, broth, or balsamic vinegar. Scrape up browned bits for extra flavor.
- Taste & Adjust:
- Once golden brown and sweet, taste and adjust seasoning. Add a pinch of sugar if desired.
- Serve or Store:
- Use immediately or store in an airtight container in the fridge for up to 5 days or freeze for up to 3 months.
Notes
- Butter vs. Oil: Butter adds richness; oil prevents burning. Use both for the best results!
- Storage Tips: Freeze in small portions for easy use in soups, pasta, or sandwiches.
- Optional Add-Ins: Try balsamic vinegar, garlic, or red pepper flakes for a flavor twist.


2 thoughts on “How to Make Perfect Caramelized Onions – Sweet, Savory & Full of Flavor!”
Comments are closed.