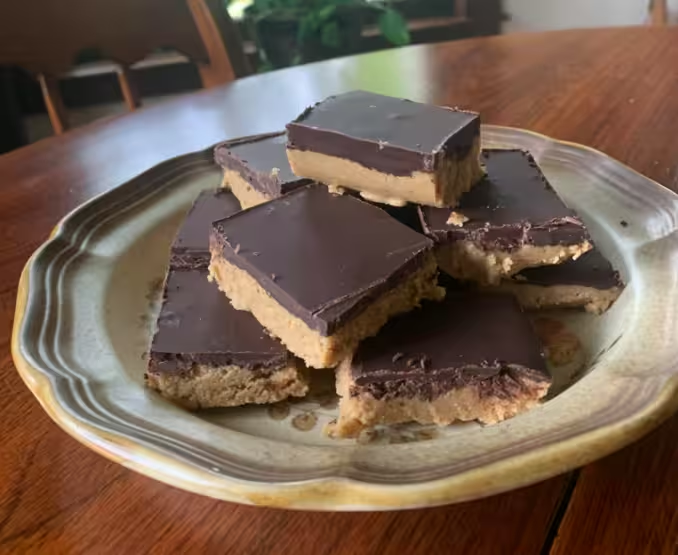
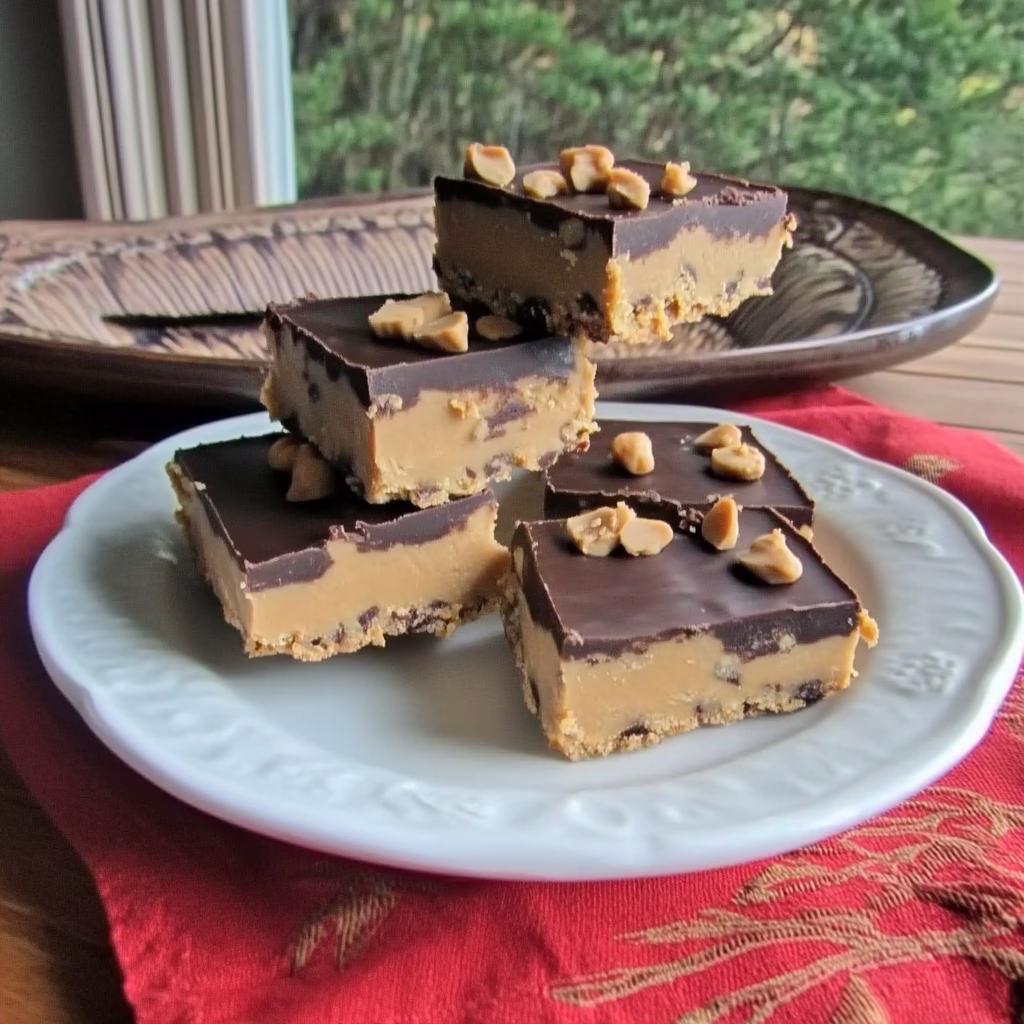
Hey there, friend! Let’s talk about the dessert that’s bailed me out of more kitchen disasters than I can count: No-Bake Peanut Butter Buckeye Bars. Picture this: It’s 10 p.m., my kids just remembered they need treats for tomorrow’s bake sale, and I’m this close to handing them a bag of chocolate chips and calling it a day. But then I remember this recipe—10 minutes of prep, ingredients I always have, and a payoff that makes everyone think I’m a dessert wizard. These bars are my lifeline for last-minute parties, holiday gifting, or just surviving a tough day. Let me show you how you can master them—no fancy skills required!
Why These No-Bake Peanut Butter Buckeye Bars Will Become Your BFF
- Zero Oven Drama: Perfect for summer heatwaves, tiny apartments, or when your oven’s on strike (mine once died mid-casserole—trauma!).
- 5-Ingredient Simplicity: Peanut butter, chocolate, butter… you probably have everything right now.
- Kid-Approved Fun: Let little ones smash pretzels for topping or “test” the peanut butter dough. My 7-year-old calls it “cookie Play-Doh.”
- Make-Ahead Magic: Freeze them for 2 months—I stash some behind the frozen peas for secret snacking.
- Crowd-Pleasing Power: I’ve brought these to 3 potlucks this year… and 3 people asked me to marry them. (Okay, one was my grandma, but still!)
True Story: Last Christmas, I burned two batches of gingerbread cookies. Desperate, I made these bars instead. My brother-in-law said, “Why’d you even bother with the cookies?!” Now, they’re his birthday “cake.”
Ingredients You’ll Need (and Easy Swaps!)
(Makes 16 bars | Total time: 20 mins + chilling)
For the Peanut Butter Layer:
- 1½ cups creamy peanut butter (Jif or Skippy—not natural! The oil separation will haunt you.)
- ½ cup (1 stick) unsalted butter, softened (Salted works too—just skip the added salt. Pro tip: Microwave the butter 5 sec if it’s stubborn!)
- 2 cups powdered sugar (Sift it unless you enjoy lump-hunting!)
- 1 tsp vanilla extract (Imitation is fine, but real vanilla makes it smell like heaven.)
- Pinch of salt (Balances the sugar rush—trust me!)
For the Chocolate Topping:
- 1½ cups semi-sweet chocolate chips (Milk chocolate if you’re extra sweet! I’ve even used leftover Easter bunny bits!)
- 2 tbsp coconut oil (Makes the chocolate glossy and sliceable. No coconut taste—promise!)
Optional Add-Ons:
- Crushed pretzels (Sweet + salty = addiction!)
- Flaky sea salt (For that “fancy bakery” vibe.)
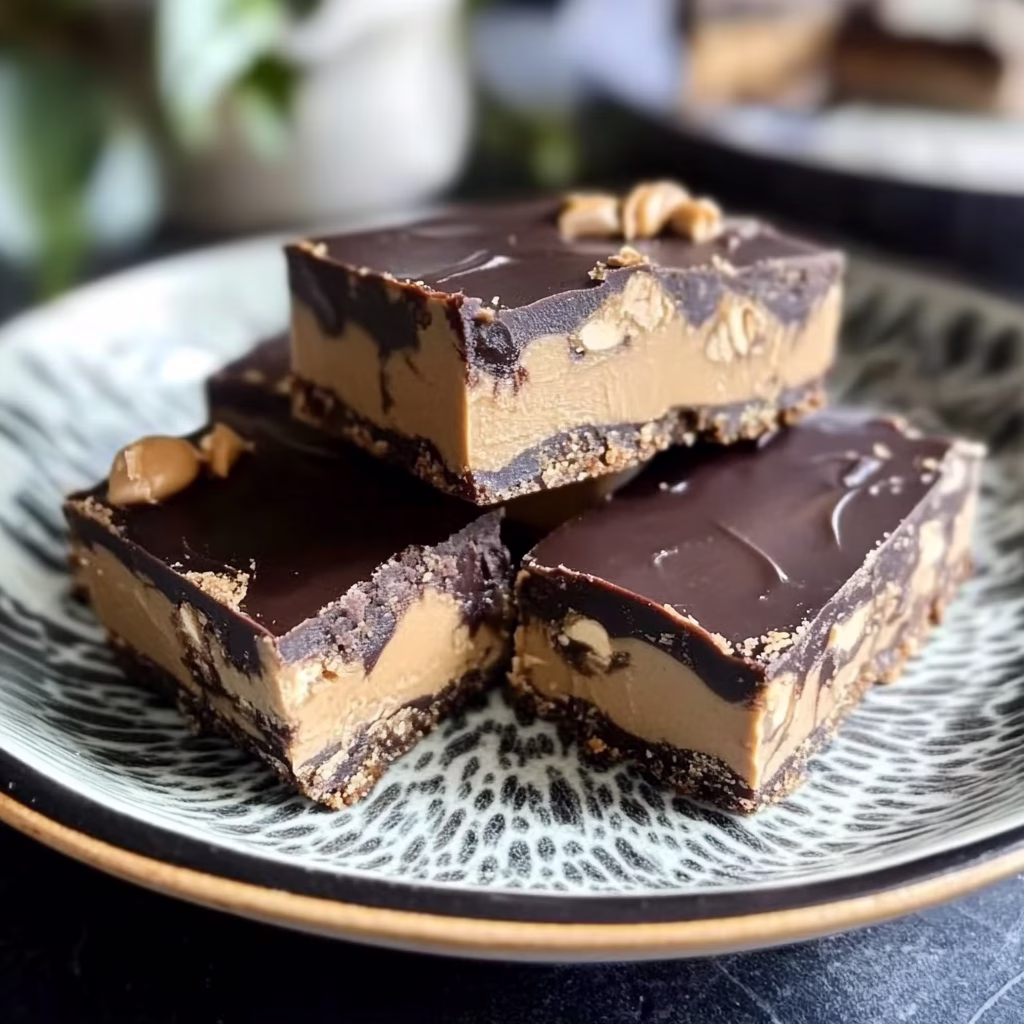
- Mini Reese’s cups (Chop them up—peanut butter overload!)
- Rainbow sprinkles (Kids go nuts for these—literally!)
Step-by-Step Instructions (Chaos-Proof!)
Follow along like we’re standing side-by-side in my crumb-covered kitchen!
1. Make the Peanut Butter Base (5 mins):
- Grab a big mixing bowl. Plop in the peanut butter and softened butter. Use a hand mixer (or a wooden spoon and some elbow grease!) to beat until smooth. Pro tip: If your peanut butter’s stiff, microwave 10 sec first!
- Gradually add powdered sugar, vanilla, and salt. Mix until it looks like cookie dough. Warning: It’ll be THICK. My mixer once groaned like a haunted house—don’t panic!
2. Press Into Pan (3 mins):
- Line an 8×8-inch pan with parchment paper—let the edges hang over like a sling. This makes lifting the bars out so much easier.
- Dump the peanut butter mixture into the pan. Wet your fingers (or use a spatula) to press it flat. Aim for “kind of even”—perfection is overrated!
3. Melt the Chocolate (5 mins):
- Toss chocolate chips and coconut oil into a microwave-safe bowl. Microwave in 30-second bursts, stirring each time, until silky. Don’t walk away—burnt chocolate smells like regret!
- No microwave? Use a double boiler: Simmer water in a pot, place bowl on top (don’t let it touch water!), and stir until melted.
4. Spread & Decorate (5 mins):
- Pour melted chocolate over the peanut butter layer. Tilt the pan to spread it—swirls are charming!
- Now’s the time: Sprinkle crushed pretzels, sea salt, or Reese’s cups. My toddler once added Goldfish crackers… surprisingly not terrible?
5. Chill & Slice (1–2 hours):
- Refrigerate until firm (1–2 hours). Need it faster? Freeze 30 mins!
- Lift the bars out using the parchment sling. Slice with a sharp knife (dip it in hot water for cleaner cuts!).
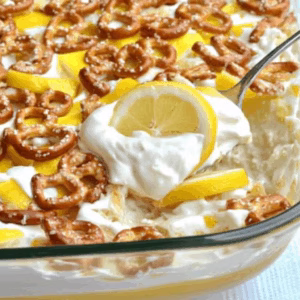
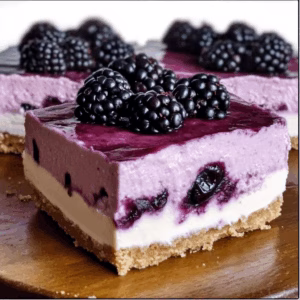
More dessert:
- Moose Farts
- Mini Pumpkin Cheesecakes
- Cinnamon Roll Sugar Cookies
- Dubai Chocolate Strawberry Cups 🍫🍓Easy English & Personal Touch!
- Iced Strawberry Matcha Latte: How I Went from Clumpy Disaster to Coffee Shop-Worthy Sips (And Saved $200 a Month)
- Valentine Chocolate Covered Strawberries – Romantic, Decadent & Foolproof
- Moose Balls Dessert – No-Bake, Bite-Sized Bliss for Every Sweet Craving
My Top Tips (Learned Through Kitchen Meltdowns!)
- Too Sticky? Add 2–3 tbsp more powdered sugar. Too crumbly? Add 1 tbsp milk.
- Chocolate Too Thick? Stir in 1 tsp coconut oil. Too thin? Add more chips!
- Freeze for Later: Layer bars between parchment in a freezer bag. Thaw at room temp—they taste fresh!
- Shortcuts: Use store-bought peanut butter dough (like Pillsbury) in a pinch!
- Allergy-Friendly: Swap peanut butter for sunflower seed butter and use dairy-free chocolate.
FAQs (Because We’ve All Had Chocolate Disasters!)
Q: Can I use crunchy peanut butter?
A: Yes! It adds texture. My dad insists on it—he says smooth PB is “for babies.”
Q: How long do these keep?
A: Fridge 1 week (glaze stays firm) or freezer 2 months. They’ve never lasted 48 hours in my house!
Q: Can I make these vegan?
A: Use vegan butter and dairy-free chocolate. Check peanut butter labels—some have honey!
Q: My chocolate cracked when slicing. Help!
A: Let the bars sit at room temp 10 mins first. Or call it “artisan marbling” and own it!
Q: No coconut oil?
A: Use 1 tbsp butter or shortening. The fat keeps the chocolate soft and sliceable!
Q: Can I skip the chocolate topping?
A: Blasphemy! But if you must, roll the PB dough into balls and dip halfway in chocolate—classic buckeyes!
Serving Ideas to Make You the Hero
- Holiday Platter: Pair with peppermint bark and gingerbread men. Add a sprig of mint for color!
- Game Day Snack: Cut into tiny squares and stick with toothpicks. Label them “Touchdown Bites!”
- Gift Giving: Stack in a cookie tin lined with wax paper. Tie with twine and a cinnamon stick.
- Midnight Snack: Keep a secret stash in the veggie drawer (no one looks there!).
- Brunch Bonus: Serve with coffee—sweet + bitter = perfection.
The Story Behind These Bars
These bars were born during a blackout. A storm knocked out our power, and my oven was useless. Desperate to distract my sugar-crazed kids, I grabbed peanut butter, powdered sugar, and a flashlight. We mixed the dough by phone light, melted chocolate over a camping stove, and created what my daughter called “blackout brownies.” They were such a hit, we now make them every storm season—by candlelight, for drama!
Another time, I brought them to a work potluck. My boss, who’s usually all kale and quinoa, ate four and whispered, “These are my cheat day.” Now, they’re our quarterly meeting tradition.
Final Thoughts
These No-Bake Peanut Butter Buckeye Bars are my kitchen security blanket—they’re foolproof, fast, and always delicious. Whether you’re a baking newbie, a busy parent, or just someone who thinks peanut butter and chocolate should get married, this recipe is your ticket to dessert nirvana.
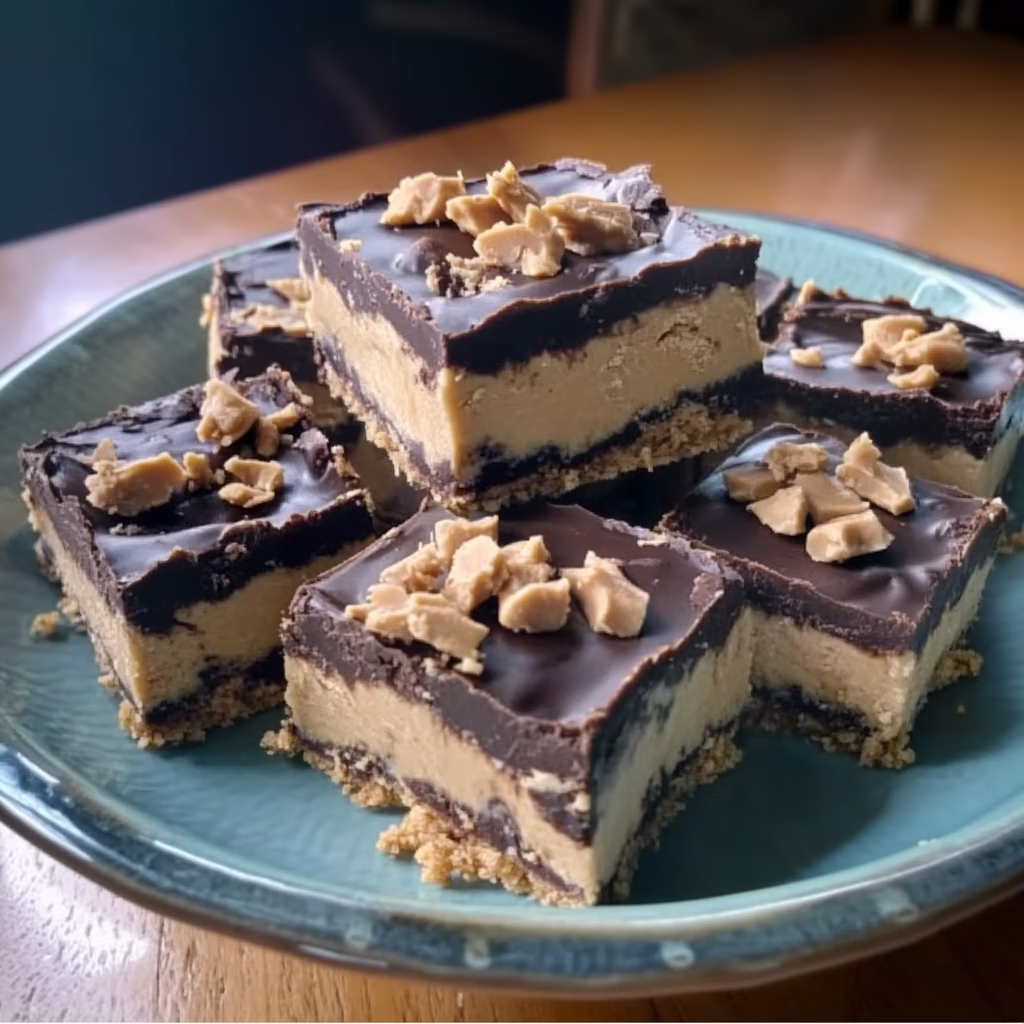
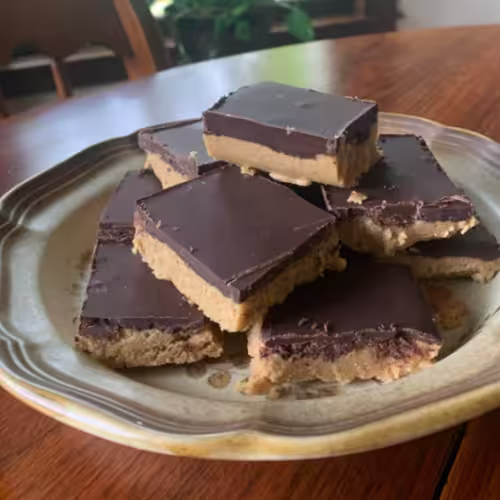
No-Bake Peanut Butter Buckeye Bars
Ingredients
For the Peanut Butter Layer:
- 1½ cups creamy peanut butter Jif or Skippy; avoid natural PB
- ½ cup 1 stick unsalted butter, softened
- 2 cups powdered sugar sifted
- 1 tsp vanilla extract
- Pinch of salt
For the Chocolate Topping:
- 1½ cups semi-sweet chocolate chips
- 2 tbsp coconut oil or 1 tbsp butter
Optional Add-Ons:
- Crushed pretzels
- Flaky sea salt
- Mini Reese’s cups chopped
- Rainbow sprinkles
Instructions
Make the Peanut Butter Base
- In a large bowl, beat peanut butter and softened butter until smooth.
- Gradually mix in powdered sugar, vanilla, and salt until a thick dough forms.
Press Into Pan
- Line an 8×8-inch pan with parchment paper, leaving extra over the edges.
- Press peanut butter mixture evenly into the pan.
Melt the Chocolate
- In a microwave-safe bowl, melt chocolate chips and coconut oil in 30-second bursts, stirring between each, until smooth.
- Alternatively, use a double boiler to melt the chocolate.
Spread & Decorate
- Pour melted chocolate over the peanut butter layer and spread evenly.
- Sprinkle with pretzels, sea salt, or Reese’s pieces if using.
Chill & Slice
- Refrigerate for 1–2 hours until firm (or freeze for 30 minutes).
- Lift bars from the pan using the parchment sling and cut into squares.