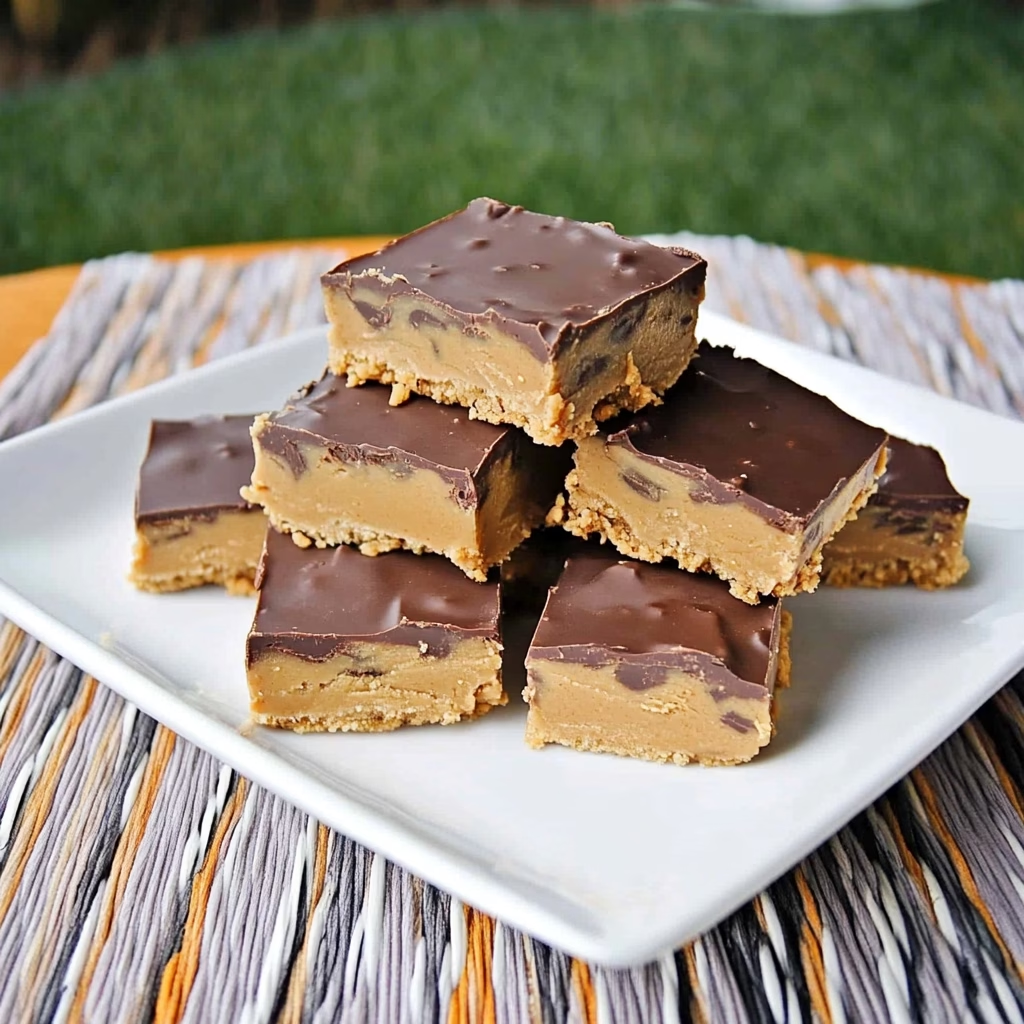
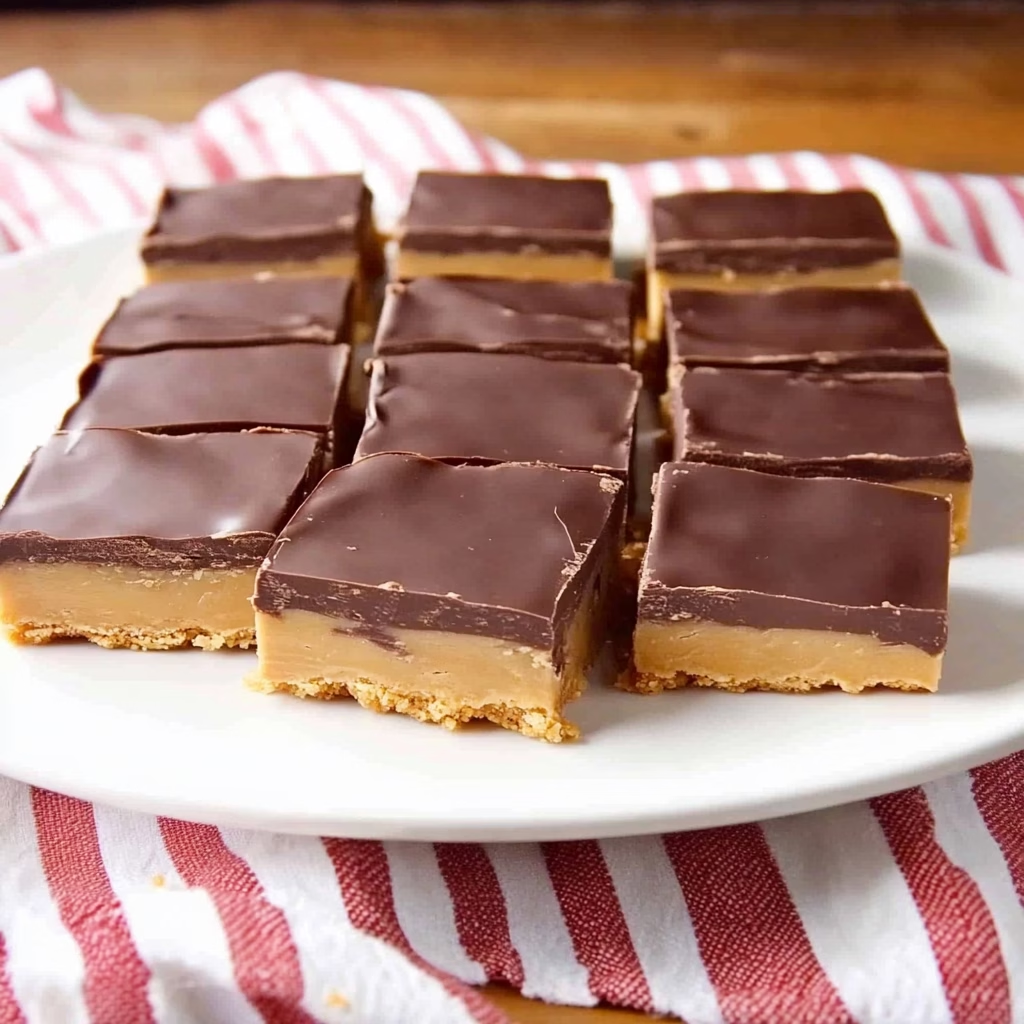
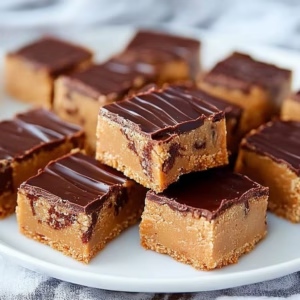
Hey there, sweet tooth! Let’s talk about No-Bake Chocolate Peanut Butter Bars—the creamy, dreamy, ridiculously easy treat that’ll make you the hero of snack time. Picture this: a crunchy graham cracker base, a layer of silky peanut butter fudge, and a glossy chocolate topping. No oven, no fuss, no waiting. I’ve eaten enough sad desserts to know you deserve better. And guess what? These bars are so simple, even my 7-year-old niece can make them (and she once tried to bake cookies with Play-Doh). Let’s get mixing!
Why You’ll Love These No-Bake Chocolate Peanut Butter Bars
Let’s be real: Life’s too short for complicated desserts. Here’s why you’ll worship these bars:
- Ready in 15 minutes. Mix, chill, devour. Zero baking skills needed.
- Pantry staples only. You probably have everything in your kitchen right now.
- Kid-approved + adult-loved. Perfect for lunchboxes, potlucks, or midnight fridge raids.
- Customizable. Gluten-free? Vegan? Nut-free? No problem—you call the shots!
Plus, I’ve made all the mistakes so you don’t have to. (RIP to my first batch, which turned into a sticky spoon-licking mess. We’ve evolved.)
My No-Bake Bar “Epiphany” Story
Once upon a time, I forgot my best friend’s birthday. Panicking, I whipped up these bars with whatever I had in my pantry. They were so good, she now “forgets” her birthday every year just to get more. True story. Moral? You don’t need fancy ingredients or hours of work to make magic happen.
Ingredients for No-Bake Chocolate Peanut Butter Bars (Simple & Cheap!)
For the crust:
- 1.5 cups graham cracker crumbs (or gluten-free crackers, crushed Oreos, or pretzels!).
- ½ cup melted butter (or coconut oil for a vegan twist!).
- ¼ cup sugar (skip if using sweetened crackers!).
For the peanut butter layer:
- 1 cup creamy peanut butter (natural or regular—just stir well if oily!).
- ½ cup powdered sugar (or maple syrup for less sweetness!).
- 1 tsp vanilla extract (imitation works too—no judgment!).
For the chocolate topping:
- 1 cup chocolate chips (milk, dark, or semi-sweet!).
- 2 tbsp peanut butter (helps the chocolate set smoothly!).
Step-by-Step Guide to Perfect No-Bake Bars (No Oven, No Problem!)
Step 1: Crush, Mix, Press (The Crust)
- Crush graham crackers in a zip-top bag with a rolling pin (or use a food processor). Channel your inner Hulk—smash them into fine crumbs.
- Mix crumbs with melted butter + sugar until it feels like wet sand.
- Press into a lined 8×8 pan. Use a glass to flatten it hard—this prevents crumbly chaos later.
Pro tip: Lick the buttery spoon. You’ve earned it.
Step 2: Whip Up the Peanut Butter Fudge Layer
- Mix peanut butter + powdered sugar + vanilla in a bowl. Stir until smooth.
- Spread over the crust. Use a spatula to make it perfectly even.
My disaster story: I once used chunky peanut butter. The layer looked like a lunar landscape. Go creamy for smoothness!
Step 3: Melt the Chocolate Topping
- Melt chocolate chips + peanut butter in the microwave (30-second bursts, stirring in between!).
- Pour over the peanut butter layer. Tilt the pan to spread it like a pro.
Hot tip: Sprinkle sea salt or crushed nuts on top for ~gourmet vibes~.
Step 4: Chill & Try Not to Eat It All
- Refrigerate for 2 hours (or freeze for 30 mins if you’re impatient like me!).
- Slice into bars. Use a warm knife for clean cuts (dip it in hot water, then dry!).
More Dessert
- 🧄 Roasted Garlic Aioli: The Creamy, Dreamy Condiment That’ll Make You Question Store-Bought Forever
- Creamy Chocolate Cottage Cheese Ice Cream: How I Accidentally Invented My Guilt-Free Obsession (And Burned My Blender)
- Classic Almond Croissants: How I Survived 12 Failed Batches to Bake Like a Parisian (Sort Of)
- Homemade Reese’s Cups: How I Beat My Candy Bar Addiction (And Burned My Thumb with Chocolate)
- Gordon Ramsay’s Chicken Sandwich: How I Finally Nailed the Crispy, Juicy Perfection (After Burning 3 Batches)
- Greek Turkey Meatballs with Tzatziki: How My Big Fat Greek Vacation Inspired My Go-To Weeknight Miracle
- 🥯 High-Protein Greek Yogurt Bagels: Your New Breakfast BFF (That Won’t Judge Your Coffee Addiction)

7 Tips for No-Bake Chocolate Peanut Butter Bars That Slay
- Line your pan with parchment paper. Lifesaver for easy removal!
- Press the crust HARD. Loose crumbs = messy bars.
- Room temp peanut butter mixes smoother than cold.
- Add a splash of milk if your chocolate seizes up.
- Freeze leftovers for up to 3 months (if they last that long!).
- Double the batch. Trust me, you’ll want extras.
- Got no graham crackers? Use crushed cereal, cookies, or even crackers!
10+ Ways to Make These Bars Your Signature Dessert
- Vegan: Use coconut oil + dairy-free chocolate + maple syrup.
- Protein-packed: Stir protein powder into the peanut butter layer.
- Nut-free: Swap peanut butter for sunflower seed butter.
- Crunchy: Add chopped pretzels or Rice Krispies to the crust.
- Fancy twist: Layer with caramel or jam under the chocolate.
- Cookie dough style: Mix mini chocolate chips into the peanut butter layer.
- Spicy: Add a dash of cayenne to the chocolate for a kick!
- Minty: Use mint chocolate chips + a drop of peppermint extract.
- Salted caramel: Drizzle caramel sauce on top + flaky salt.
- Halloween fun: Mix orange food coloring into the peanut butter layer.
How to Serve No-Bake Chocolate Peanut Butter Bars (Like a Boss!)
- Party platter: Cut into bite-sized squares + stick with toothpicks.
- Ice cream topping: Crumble over vanilla ice cream.
- Gift idea: Stack in a cute box with ribbon—instant hero status.
- Midnight snack: Eat straight from the pan in your PJs. No shame.
- Brunch surprise: Serve with coffee—because dessert for breakfast is always right.
True story: I once brought these to a work meeting. My boss gave me a promotion (okay, maybe not—but she did steal three bars).
Troubleshooting: Fixes for Common Oops Moments
- Bars won’t set? Chill longer! The fridge is your friend.
- Crumbly crust? You didn’t press hard enough. Channel your inner wrestler next time!
- Chocolate too thick? Add a splash of coconut oil to melt it smoother.
- Too sweet? Use dark chocolate + unsweetened peanut butter.
FAQs (Because I’ve Been Asked All the Questions)
Q: Can I use almond butter?
A: Yes! Any nut/seed butter works—just adjust sweetness as needed.
Q: How long do they last?
A: 1 week in the fridge or 3 months frozen (if they survive that long!).
Q: Can I make these gluten-free?
A: Absolutely! Use GF graham crackers or crushed gluten-free cookies.
Q: Why is my chocolate layer cracking?
A: You poured it on a warm peanut butter layer. Chill the PB layer first!
Q: Can I skip the sugar?
A: Sure! Use unsweetened peanut butter + sugar-free chocolate.
Why These Beat Store-Bought Bars Every Time
Store-bought versions are packed with preservatives and weird ingredients. When you make No-Bake Chocolate Peanut Butter Bars at home, they’re fresher, creamier, and tailored to your cravings. Plus, they cost pennies compared to fancy bakery treats!
Final Thoughts: You’re a No-Bake Legend Now!
There you have it—the easiest, creamiest No-Bake Chocolate Peanut Butter Bars recipe that’ll make you the MVP of dessert time. Remember, cooking’s about fun, not perfection. So if your first batch isn’t Instagram-worthy, laugh it off and try again. (My dog once stole an entire pan. RIP, chocolate bars.)
Now go raid that pantry, crank up your favorite playlist, and whip up some magic. And when your friends demand the recipe? Send ’em my way. 😉
No-Bake Chocolate Peanut Butter Bars
Ingredients
- For the crust:
- 1 1/2 cups graham cracker crumbs
- 1 cup powdered sugar
- 1 cup peanut butter creamy or chunky
- For the chocolate topping:
- 1 1/2 cups semi-sweet chocolate chips
- 1/4 cup unsalted butter
Instructions
- Make the base: In a bowl, mix the graham cracker crumbs, powdered sugar, and peanut butter until well combined and the mixture forms a thick, dough-like consistency. Press this into the bottom of an 8×8-inch baking dish, spreading it evenly.
- Make the chocolate topping: In a microwave-safe bowl, melt the chocolate chips and butter together. Heat in 30-second intervals, stirring in between, until smooth and fully melted.
- Assemble: Pour the melted chocolate over the peanut butter base, spreading it evenly with a spatula. Refrigerate for at least 2 hours to set.
- Serve: Once set, cut the bars into squares and enjoy!
Notes
- You can add chopped nuts, coconut flakes, or a sprinkle of sea salt for extra flavor.
- If you’d like a crispy texture, try substituting Rice Krispies or Cornflakes for the graham crackers.